

Ever wanted to get a flawless French manicure but can’t handle the brush/can never get a nice smile line?
Well I have. I SUCK at French manicures. Except now. With this handy dandy tool. The Barry M Nail Art Pen in White.
I’ve even done a tutorial for you to share my marvellous discovery.

I used the Barry M Nail Art Pen in White and also the Barry M “Plumpy” Top Coat.
You could use a Base Coat Colour (I didn’t use one because I don’t have a nice French manicure colour – it has to be quite translucent to be French manicure appropriate though)
Clean Up Tools (Acetone and Brush)

What to do:
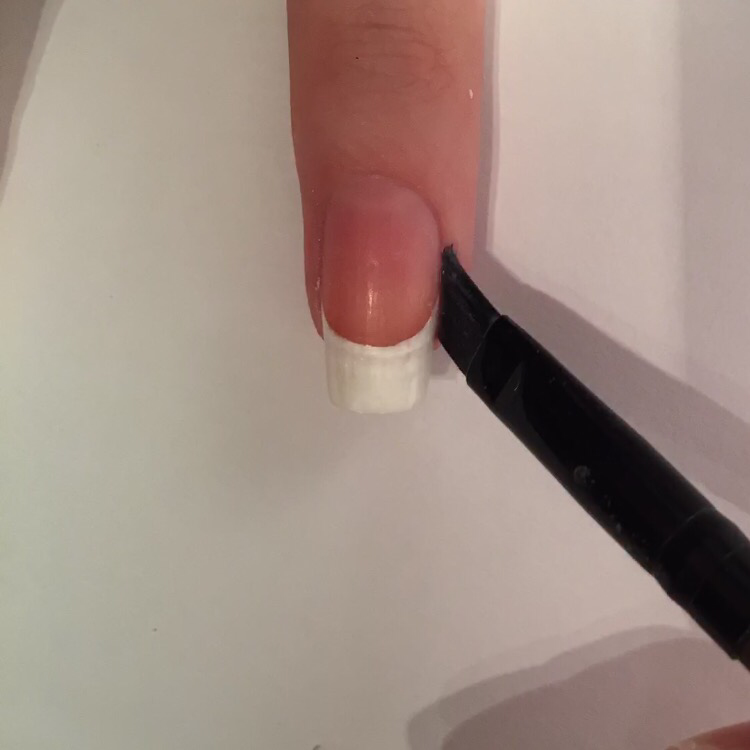
1. Using the nail art pen, draw a diagonal line from where the corner of your “white” nail tips start (where your finger is no longer attached to the nail) to where they finish (the end of your nail)

2. Do this step again on the other side of your nail.

3. Next you need to follow along (whilst drawing) the curve of your finger from where you can start to see the nail tip colour change.

4. Colour in the blank space.

5. Then colour in the two on the left and right hand side (add another coat if you want to – BUT after its dried, otherwise it will take the colour off)

6. Wait for this to dry.
7. Apply your topcoat and repeat on all other nails.

8. Get rid of any that you got on your skin by using the clean up tools.
9. Then you’re done!

I’ve done this on some shorter nails too, so you can see that it will work on shorter nails.

Here’s a laaavely comparison shot for you

